May 8, 2026
How to build a brand book
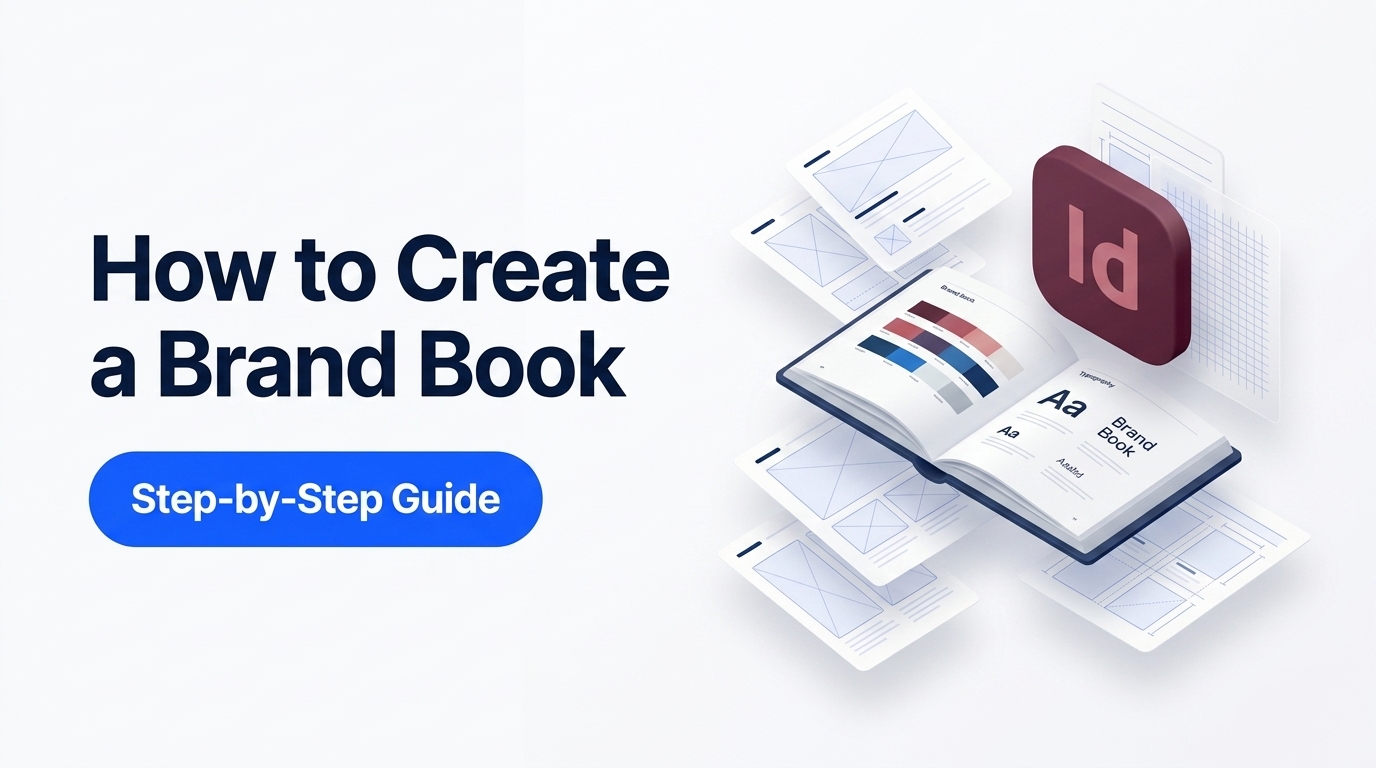
How to Build a Brand Book: What to Include and How to Structure It (Step-by-Step Guide)
Building a brand book means deciding what to include, how to structure it, and how to design it into a professional final document.
It is not just about diving straight into Illustrator, InDesign, Figma, or Canva and start designing.
A strong brand book starts with clear thinking and preparation first. You need to know what sections belong in the document, and how everything should be organised before you build the final layout.
In this guide, you’ll learn how to build a brand book properly, from planning the content and layout to designing the full brand book document itself.
If you’re new to the term, read this blog first: What is a brand book?
What does it mean to build a brand book?
Building a brand book means planning the structure, sections, and content, then designing the actual document into a clear and professional layout.
In other words, it covers both:
- deciding what should go inside the brand book
- putting those elements together into a finished document
The difficult part of building a brand book is usually figuring out:
- what needs to be included
- what order the pages should follow
- what assets need to be ready first
- how detailed the brand book should be
- how to turn all of that into a clean document
Once those decisions are clear, the design process becomes much easier.
What should you prepare before building a brand book?
Before you start designing the document, the core brand identity should already be approved.
You do not want to design pages around unfinished logo concepts, unconfirmed colors, or typography that may still change.
Here is what to prepare first.
1. Final logo files
Your logo system should already be complete.
This usually includes:
- primary logo
- secondary logo
- icon or submark
- light and dark versions
- horizontal and stacked variations if needed
2. Final color palette
Your brand colors should be final before you start building the brand book.
Make sure you have:
- primary colors
- secondary colors
- accent colors
- HEX values
- RGB values
- CMYK values if print matters
3. Typography system
By now, you will already know what fonts the brand uses and how they are applied.
Prepare:
- heading font
- body font
- optional support font
- font weights
- a clear type hierarchy
4. Visual direction
In a professional brand book, you should also prepare the wider visual style of the brand, such as:
- photography direction
- image treatment
- illustration style
- icons
- patterns
- textures or graphic elements
5. Brand strategy notes
Not every brand book needs an indepth strategy section, but some brand context is useful.
This can include:
- mission
- vision
- values
- brand personality
- tone of voice
- target audience summary
6. Application examples
Before designing the document, it's highly recommended to prepare a range of mockups of the logo and identity in use.
This could include:
- business cards
- packaging
- social media posts
- website mockups
- signage
- merchandise
What to include in a brand book
Once your assets are ready, the next step is deciding what pages the brand book should contain.
If you want inspiration first, read Best Brand Book Examples 2026 to see how other brands structure theirs.
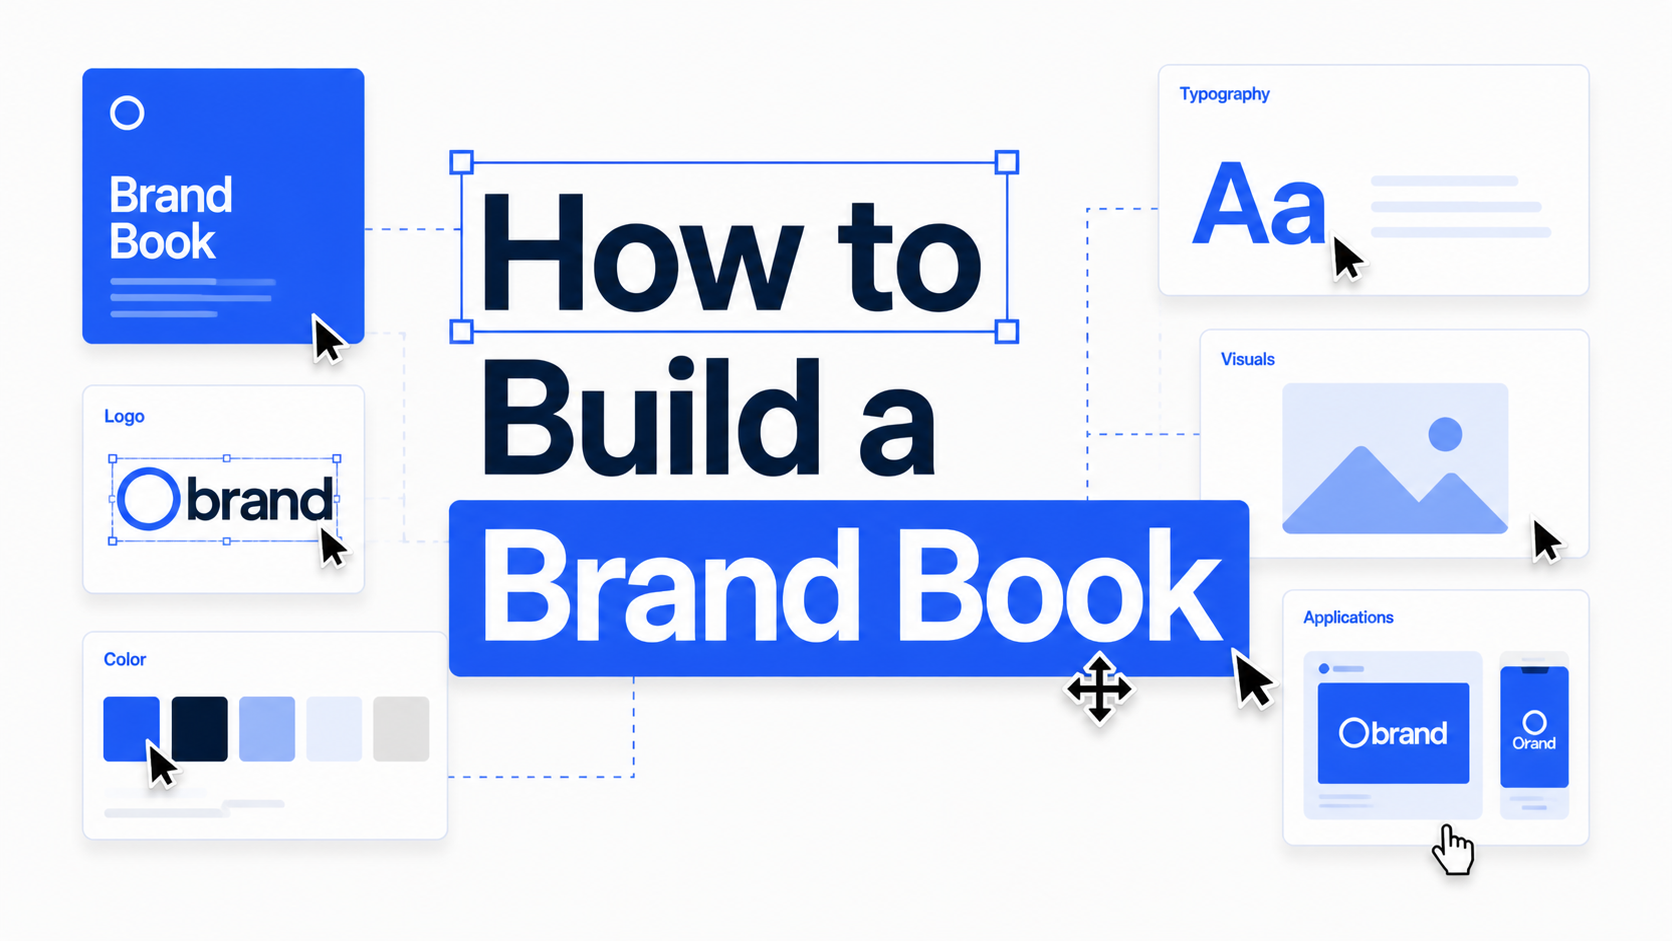
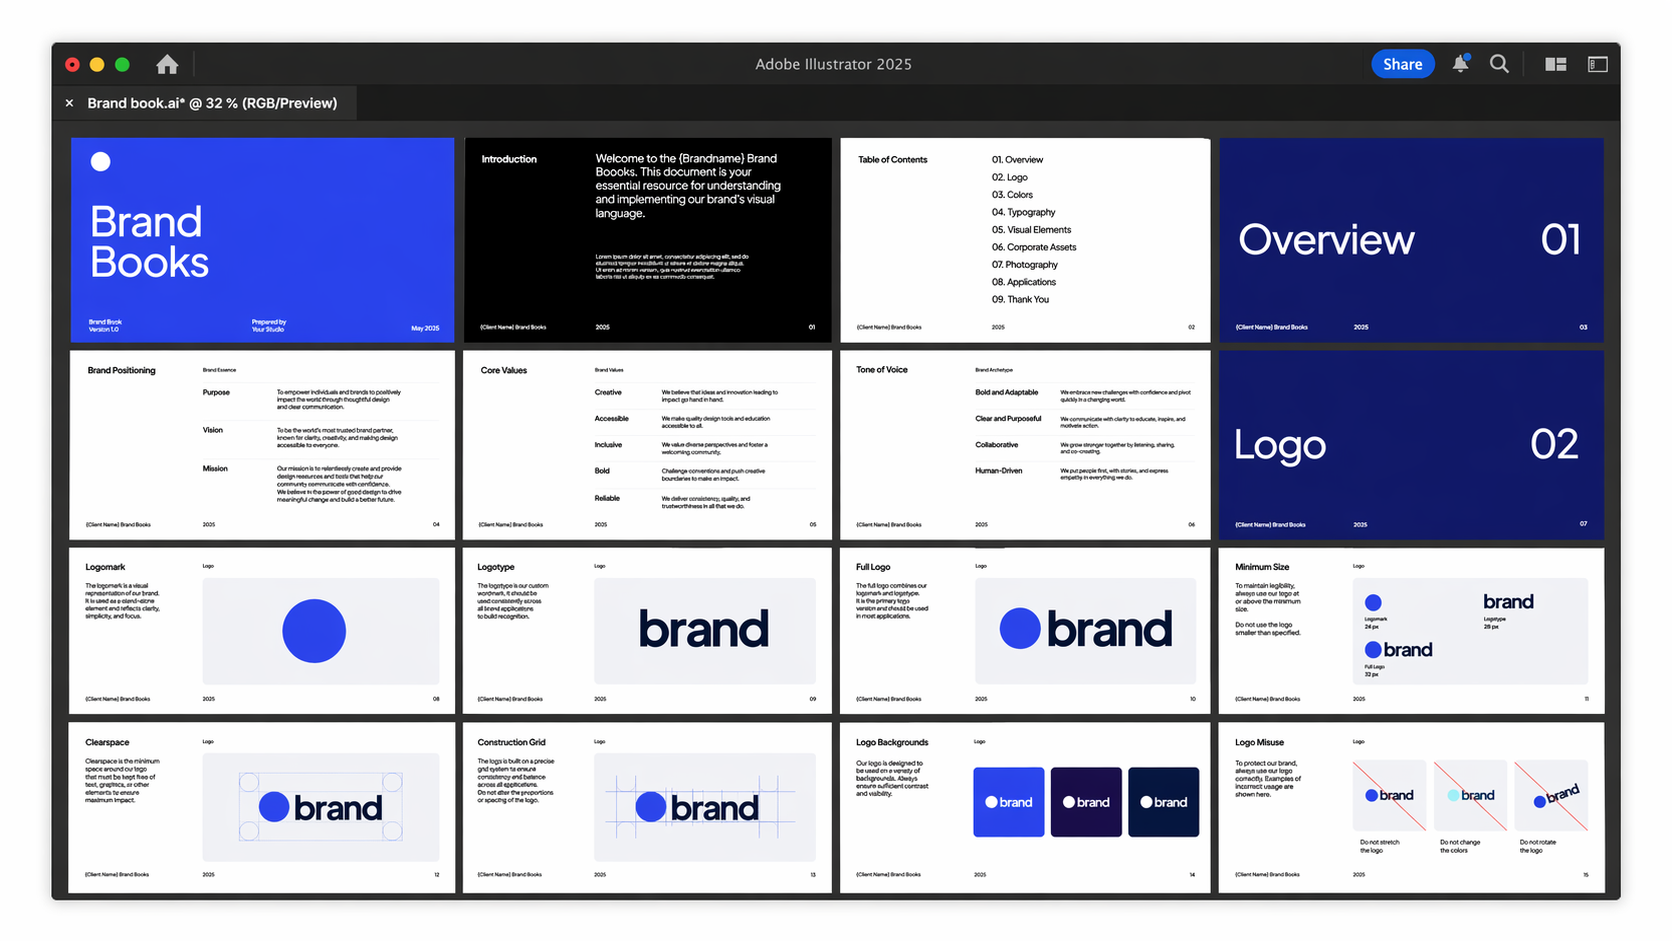
Most professional brand books include these 6 core sections/ elements.
You can learn more in depth about what to include in a brand guidelines/ brand book here
1. Brand overview
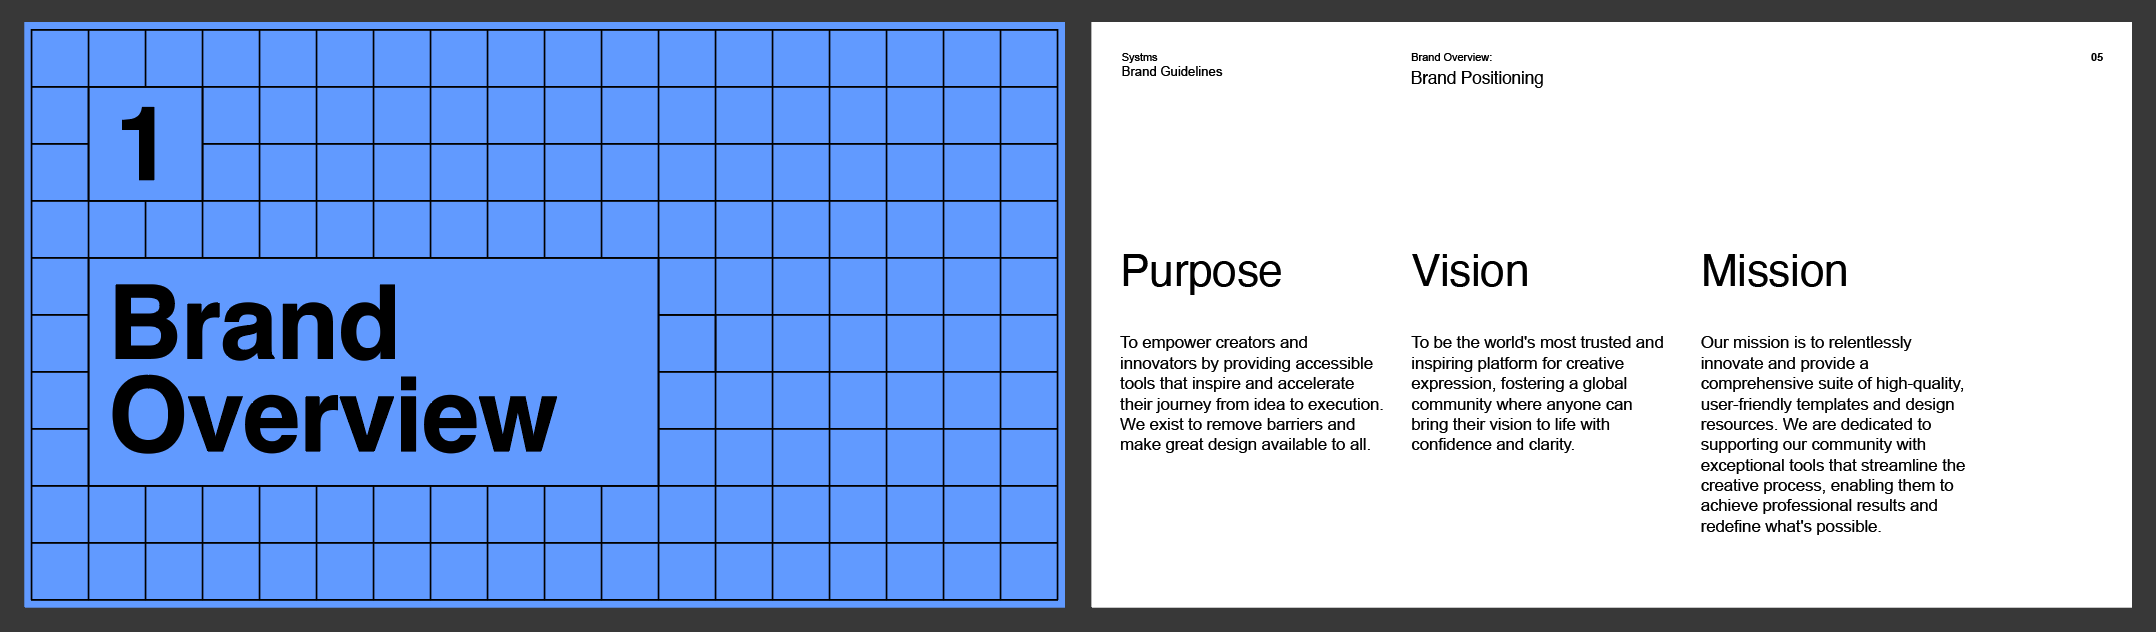
This section introduces the brand before you show any design rules.
It does not need to be long. It just needs to explain what the brand stands for and how it should be understood.
It gives context to everything that follows.
You can include:
- short brand summary
- mission
- vision
- values
- personality
- tone of voice
2. Logo usage
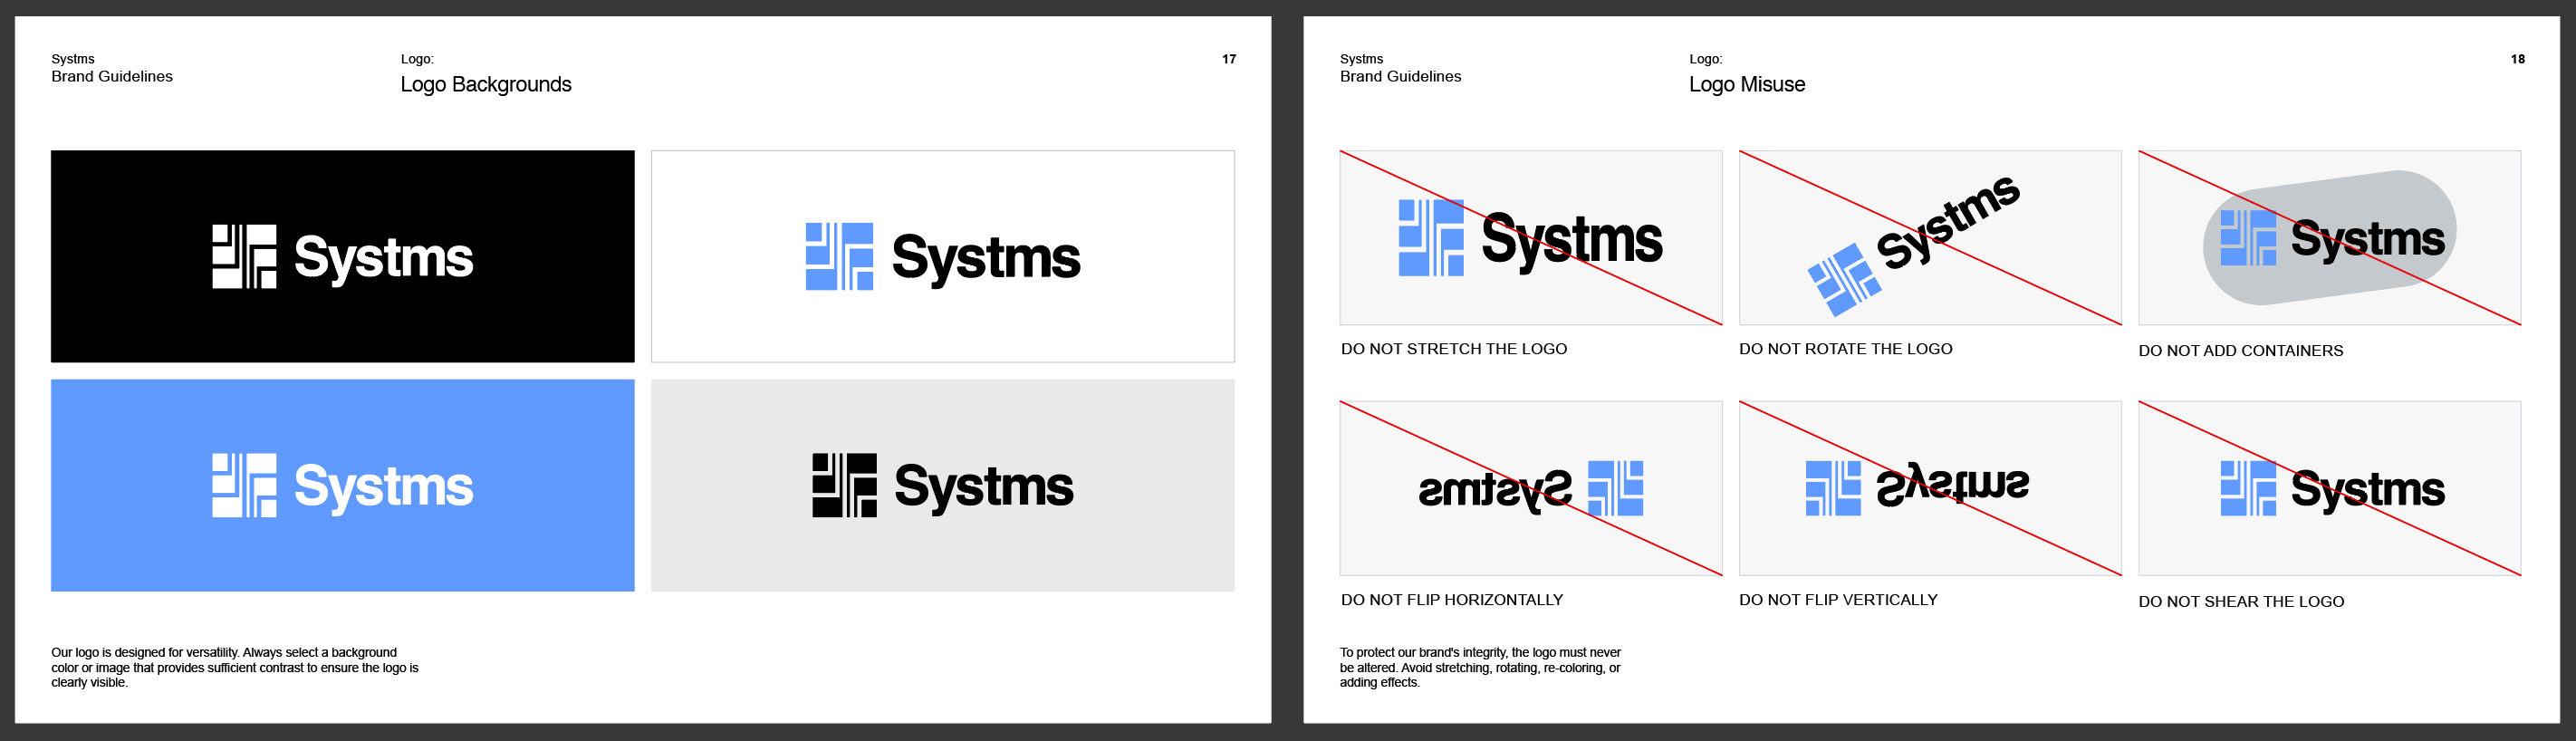
This is one of the most important parts of the brand book.
It explains how the logo should and should not be used.
Without this section, your client can end up stretching, re-coloring, inconsistently using your logos.
This section often includes:
- primary logo
- secondary logos
- clear space
- minimum size
- approved color versions
- wrong usage examples
- placement rules
3. Color palette
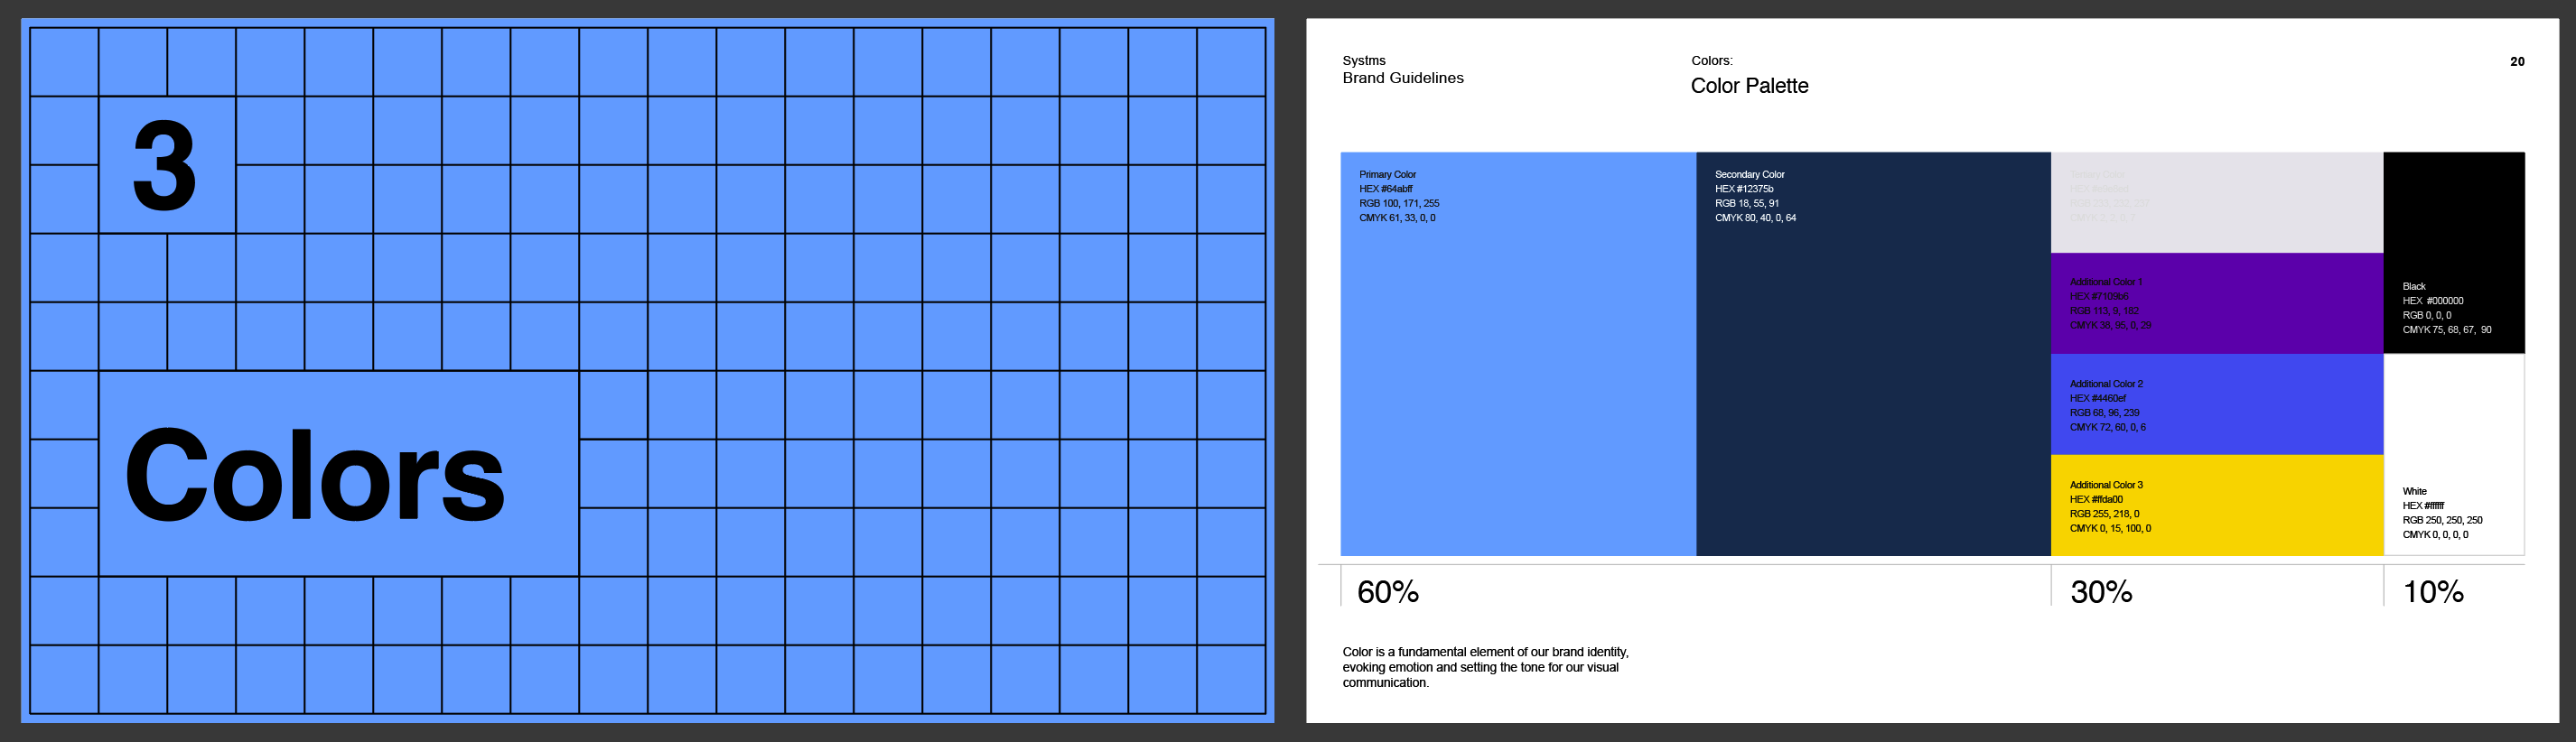
The color section defines exactly what colors belong to the brand and how they should be used.
This usually includes:
- primary palette
- secondary palette
- accent colors
- HEX, RGB, and CMYK values
- optional guidance on when to use each color
4. Typography
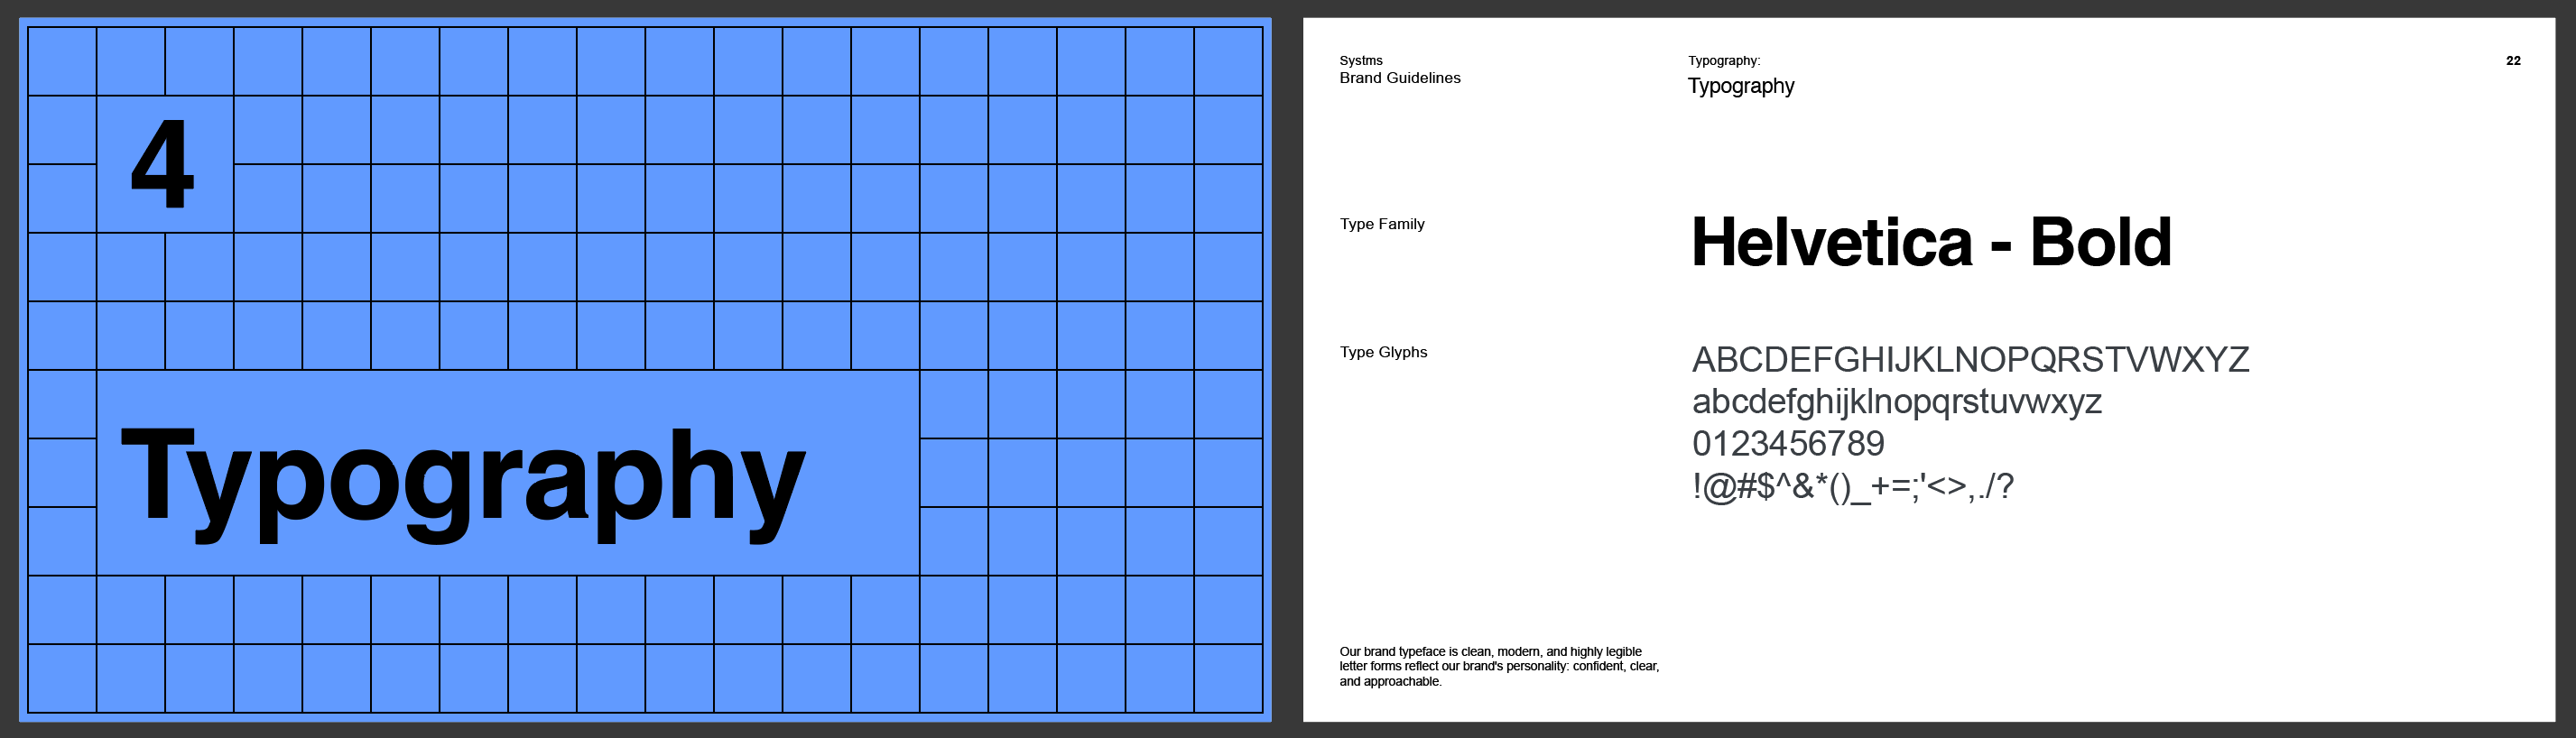
Typography gives the brand a recognizable and distinctive visual voice.
This section should show:
- primary typeface
- secondary typeface
- font weights
- heading styles
- body text styles
- hierarchy examples
5. Visual style
This section defines the wider look and feel of the brand.
Depending on the project, this might include:
- photography style
- image mood
- illustration style
- icons
- shapes
- patterns
- textures
6. Real-world applications

This is where you show the brand in action.
It helps clients and teams understand how all the parts come together.
Examples can include:
- stationery
- apparel
- packaging
- website pages
- social graphics
- presentation slides
How to structure the pages
Once you know what to include, the next step is organising the pages in the right order.
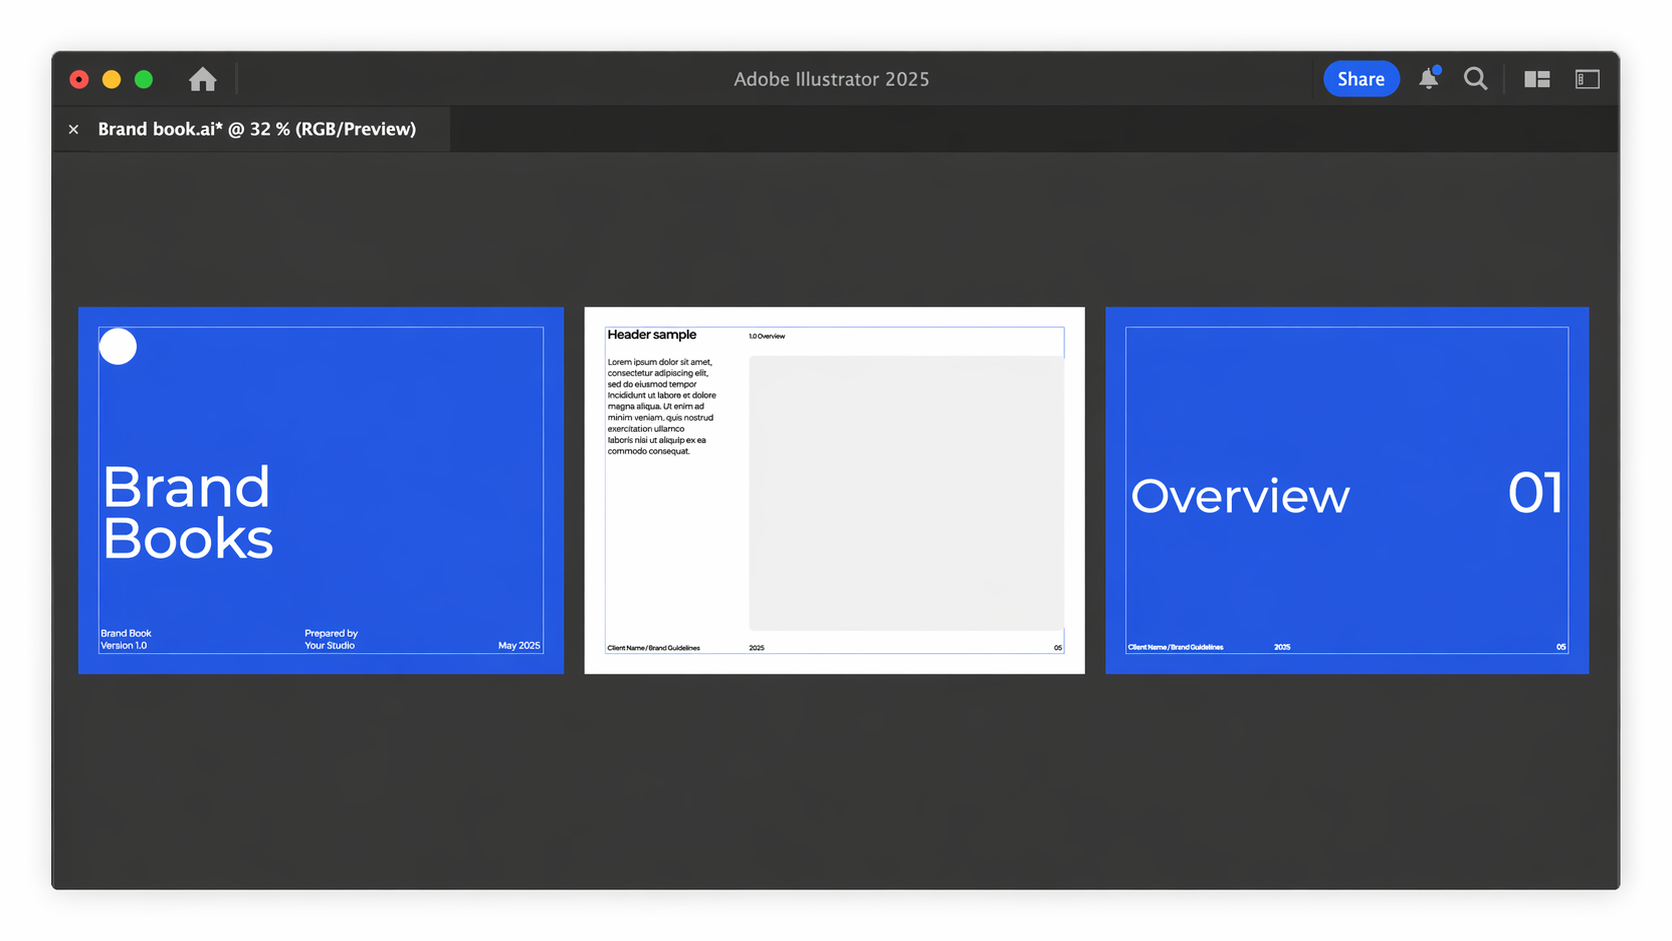
A simple brand book structure could look like this:
- Cover
- Brand overview
- Logo overview
- Logo usage rules
- Color palette
- Typography
- Visual style
- Brand applications
- Closing page or contact page
That structure is enough for many brand identity projects.
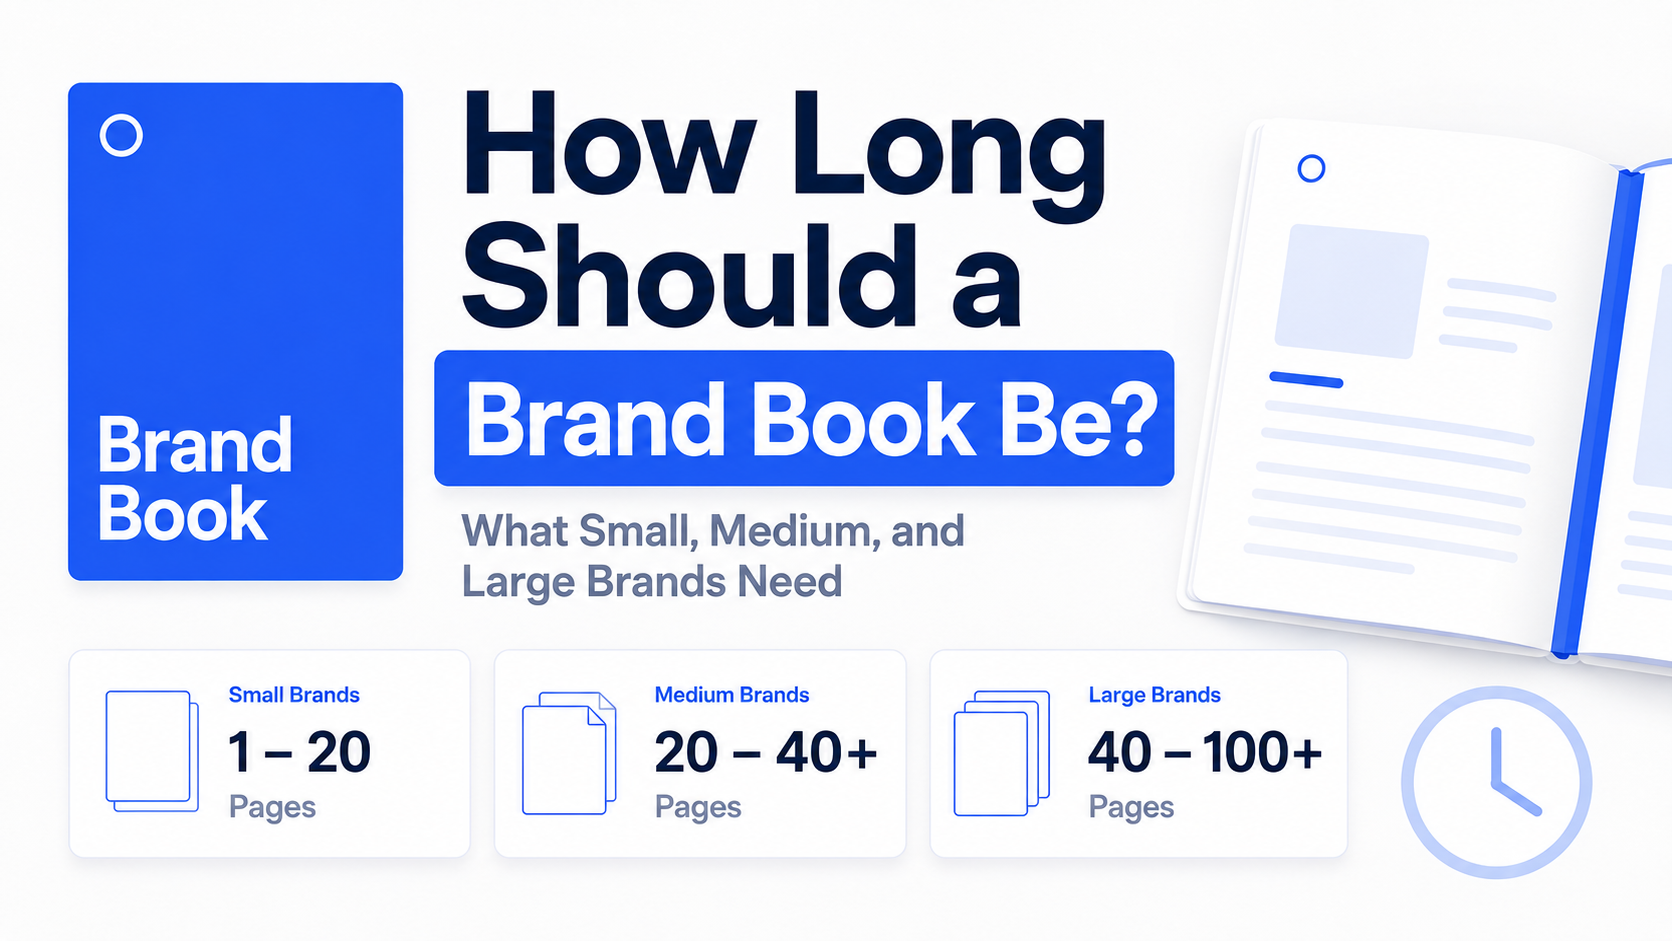
A smaller brand book might be around 8 to 15 pages, where as a more detailed one could be 20 pages or more.
The goal is not to make it longer for the sake of it. The goal is to make it clear.
How to design the brand book after planning it
Once the content, assets, and page structure are clear, you can move into the design stage.
This is the part where you turn the plan into a polished document.
A simple process looks like this:
1. Choose your software
The best platform to choose depends on your workflow, how you like to design and your creative level.
You can build a brand book in:
- Adobe Illustrator
- Adobe InDesign
- Figma
- Canva
2. Set up the document

Choose a document size and layout style that feels clear and easy to present as a PDF.
3. Create reusable page layouts
Instead of designing every page from scratch, create a few core layouts first.
This makes the process much more efficient.
For example:
- Front cover page
- Section pages
- Content cover pages
4. Add your brand content
Now place in your logos, colors, typography, imagery, and mockups based on the structure you planned earlier.
5. Export and deliver
Once the document is complete, export it as a PDF and package any editable source files if needed.
For a more in-depth guide to setting up and creating a brand book in Adobe Illustrator, read this article.
A faster way to build a brand book
There's no hiding that building a brand book from scratch takes a lot of time, especially when you are planning the structure and designing the document.
Akrivi Guideit Brand Guidelines Generator, is by far the best way to create brand books fast for professionals.
Alternitevely, you can also download our free brand book template to build your brand book faster.
And if you want to compare different ways to create a brand book (manual vs automated) before choosing your process, check out this quick read.
Conclusion
Building a brand book means more than just designing pages.
It means deciding what to include, how to structure it, and how to turn those elements into a professional final document.
Before opening Illustrator, InDesign, Figma, or Canva, you should already know:
- what assets are ready
- what sections need to be included
- how the pages should be organised
- how detailed the final document needs to be
Once that is clear, the design process becomes much faster and far less overwhelming.
If you build the brand book properly first, creating the final document becomes easier, cleaner, and more professional.